Configuration, Operations, and Security for Deploying a Spring Boot + Thymeleaf + PostgreSQL Admin App to AWS ECS/Fargate + RDS
As I built a Spring Boot + Thymeleaf admin app to run on AWS, I worked through what configuration to use, what to protect, and how to operate it going forward.
This covers the case of deploying a business app built with Java / Spring Boot / Thymeleaf / PostgreSQL to AWS ECS Fargate and RDS for PostgreSQL.
The focus of this article isn’t simply the fact that I got it running on AWS, but rather the configuration decisions I made with continuous operation of the admin app in mind.
What I particularly focused on:
- Where to place the application itself
- Where to position the database
- How narrowly to restrict external exposure
- What procedure to use for safely redeploying and verifying
- How to record findings after building so they can be reused
Reviewing billing became an important topic along the way, but it’s ultimately just one factor within the configuration decisions. The core of this article is the design I adopted to make this app run on AWS safely and in a way that’s easy to operate.
For anyone looking to deploy a Spring Boot app to AWS ECS Fargate, run PostgreSQL on RDS for PostgreSQL, or put a Thymeleaf-based admin app on AWS, this summarizes the configuration, initialization, verification steps, and operational considerations.
What This Article Covers
- How I approached placing a Spring Boot + Thymeleaf + PostgreSQL admin app on AWS ECS/Fargate + RDS
- How I separated ALB, ECS Fargate, RDS for PostgreSQL, and the NAT Gateway
- How I made the AWS deployment reproducible using Docker and the command line
- How I built database initialization and verification into operations
- Common pitfalls when deploying, and how I verified things
- How I kept billing down for verification purposes
What I Built
What I built this time is an admin app modeled on a DVD rental business.
The PostgreSQL sample database I used as the source data for this app can be found on the following page.
How I put together the app itself is covered in a separate article, so if you want to see the screen structure and implementation approach too, reading that alongside this one will connect the dots.
The main features are as follows.
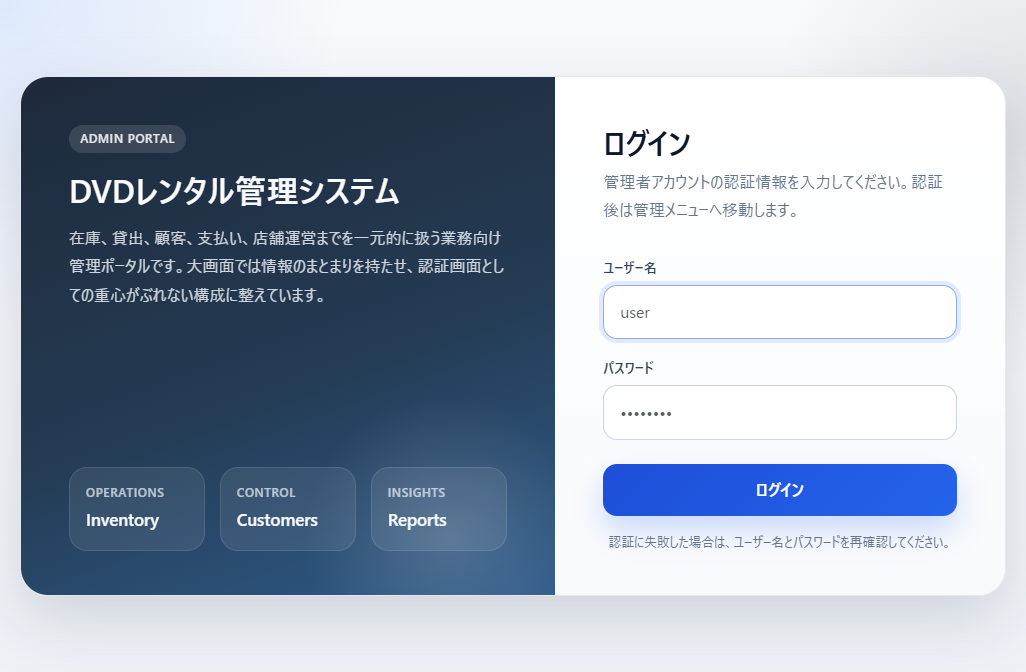
- Login
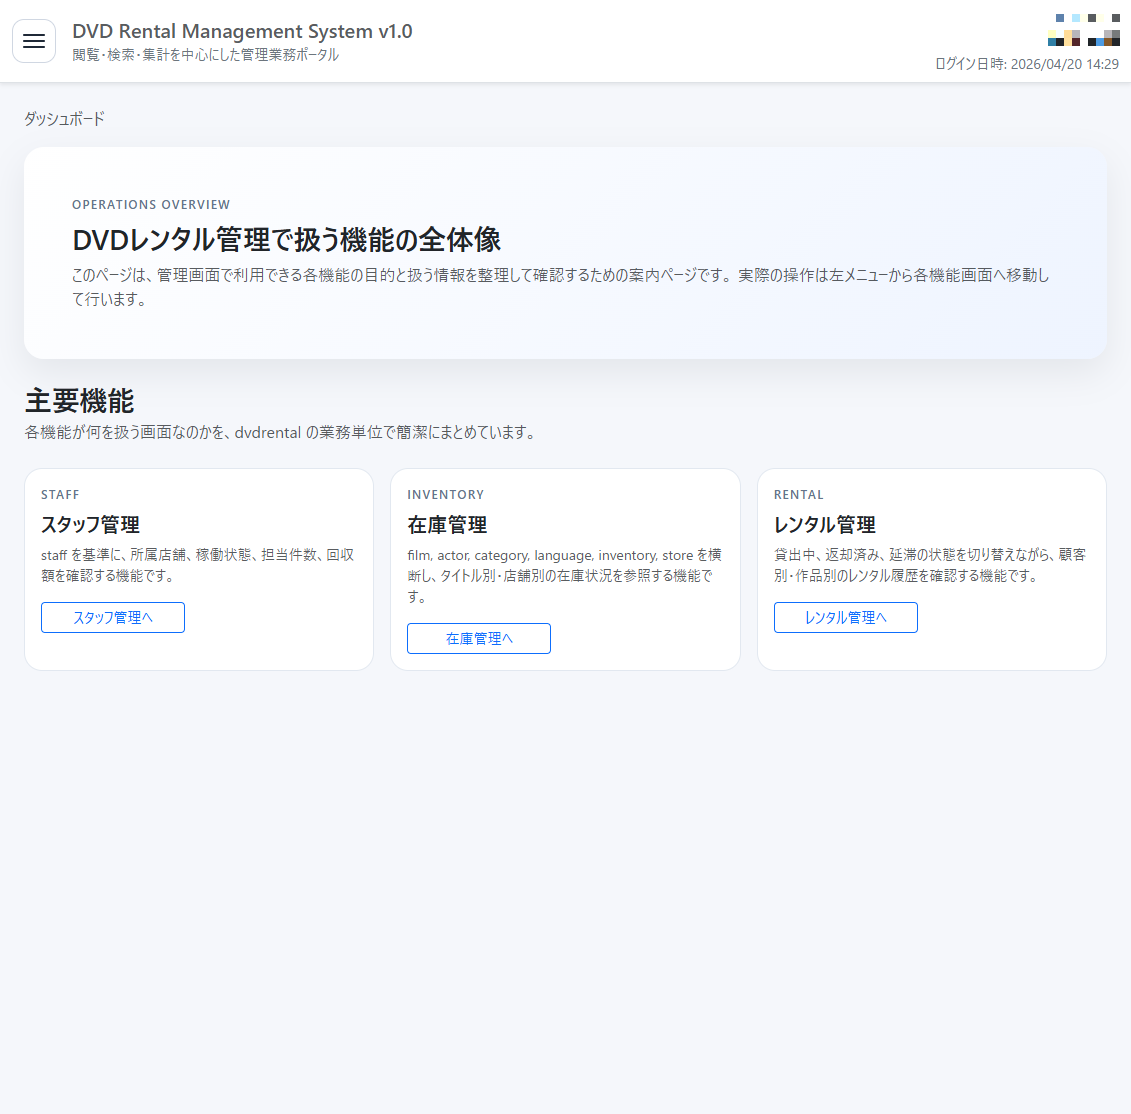
- Dashboard
- Customer management
- Store management
- Staff management
- Inventory management
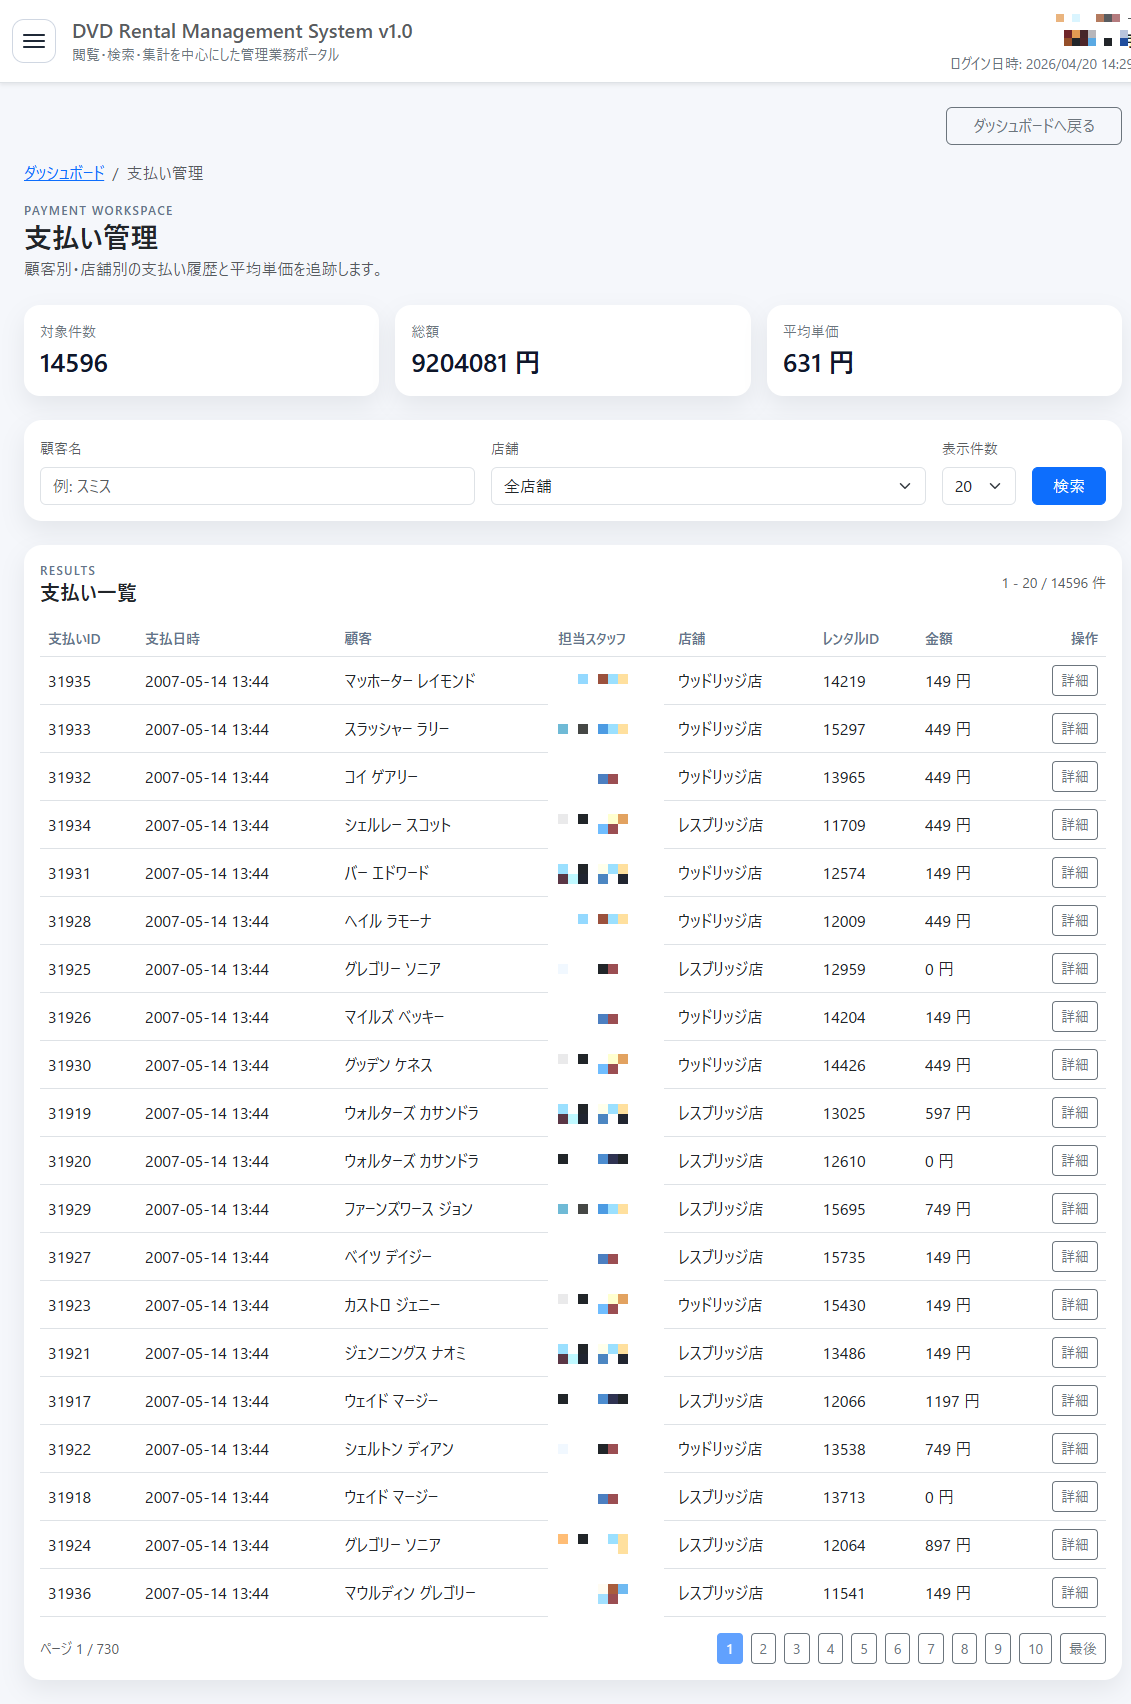
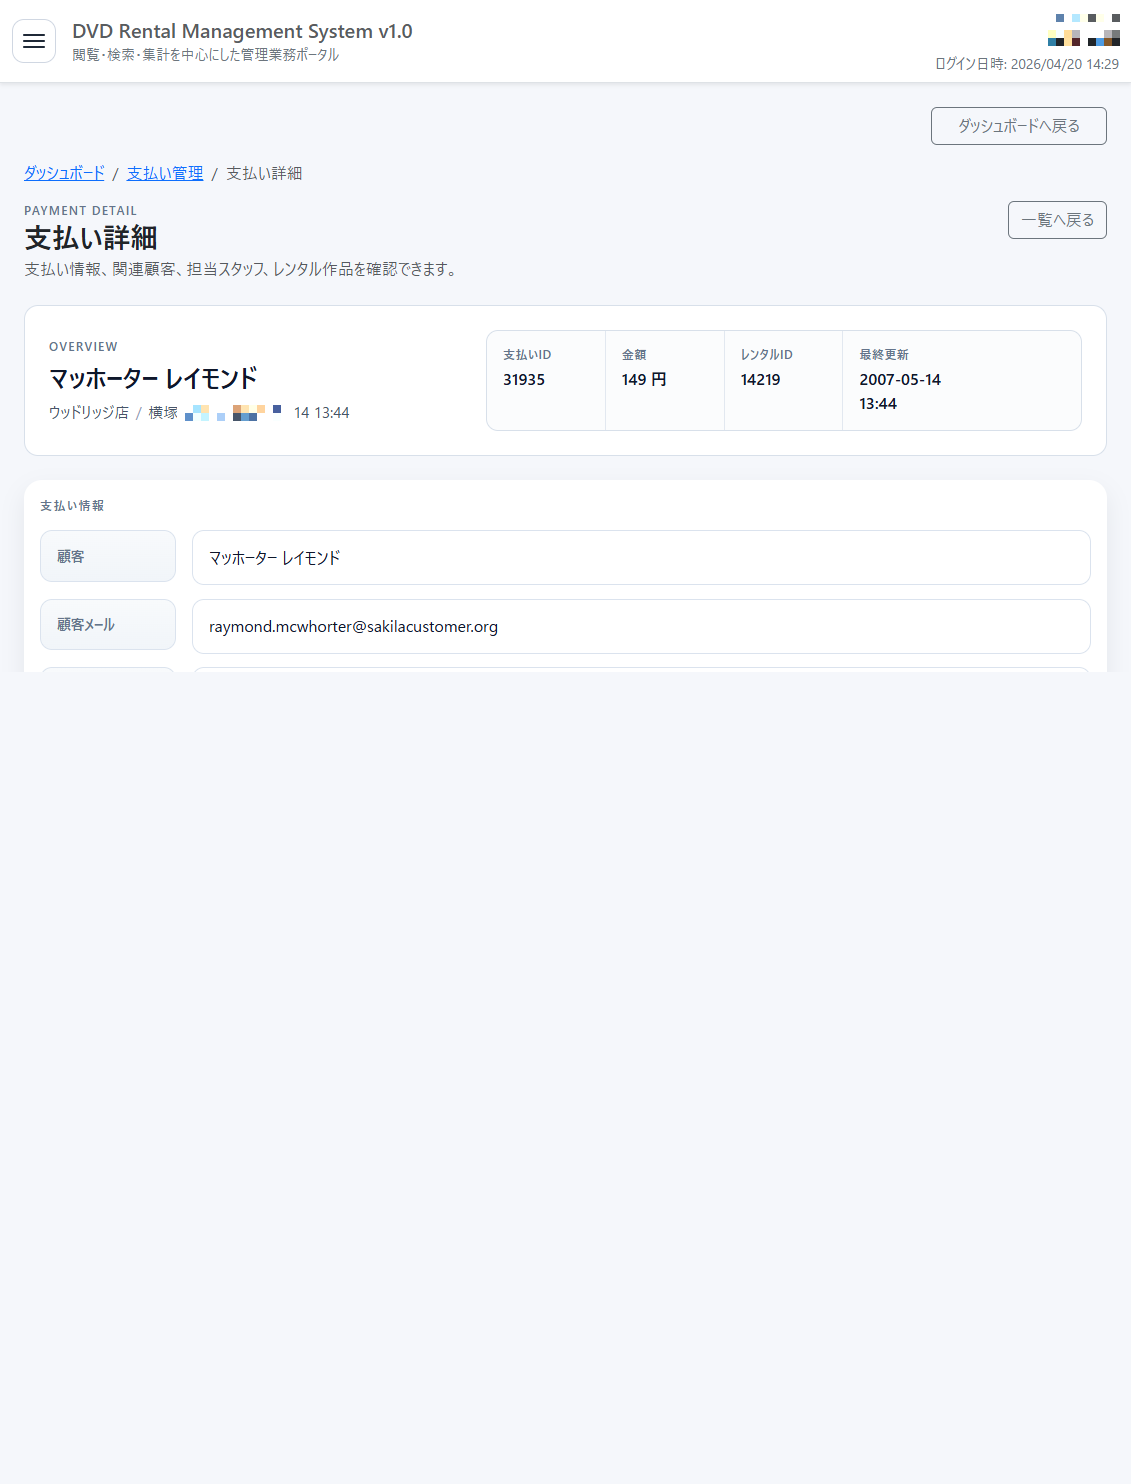
- Payment management
- Rental management
- Sales reports
The screens are server-rendered with Spring Boot + Thymeleaf, in a fairly classic business-app structure with search, detail, create, update, and confirmation screens.
Tech Stack
The main tech stack for this project is as follows.
- Java 25
- Spring Boot
- Thymeleaf
- Spring Security
- Spring Data JPA
- PostgreSQL
- Docker
- AWS ECS Fargate
- AWS RDS for PostgreSQL
- AWS Application Load Balancer
- AWS CDK
The frontend isn’t an SPA — it’s built on server-side rendering. Because of that, I designed around Spring MVC and server-side state rather than large-scale client-side state management.
Made It Reproducible from the Command Line
The most important thing about this AWS setup was not ending up with a configuration that can only be reproduced by clicking around the console by hand.
This app is set up so that build, deploy, and startup verification can all be traced through Docker and the command line. Without getting this right, you can get it onto AWS once, but the procedure will drift every time you redeploy or apply a fix.
What I did wasn’t just make docker build and cdk deploy runnable. I split out the files actually used at execution time and wrote the necessary content into each one.
The files actually used at runtime are mainly these four:
Dockerfile
This is the file that builds the Docker image. It’s actually a two-stage build — a build-stage image and a runtime-stage image. The first stage builds the jar with Maven, and the second stage keeps only what’s needed to run it.
Reading it as written, the key points are:
FROM maven:3.9.11-eclipse-temurin-25 AS build
RUN mvn -q -DskipTests package

FROM eclipse-temurin:25-jre-jammy
RUN apt-get install -y --no-install-recommends postgresql-client
COPY --from=build /workspace/target/dvd-rental-admin-0.0.1-SNAPSHOT.jar /app/app.jar
COPY docker/postgres/init/ /app/initdb/
COPY docker/aws-entrypoint.sh /app/aws-entrypoint.sh
ENTRYPOINT ["/app/aws-entrypoint.sh"]
In other words, this single file contains the following:
- Build with
maven:3.9.11-eclipse-temurin-25 - Place
dvd-rental-admin-0.0.1-SNAPSHOT.jarat/app/app.jar - Put the full set of DB initialization SQL into
/app/initdb/ - Route the startup command through
aws-entrypoint.shinstead of callingjava -jardirectly - Install
postgresql-clientin the runtime image sopsqlandpg_isreadyare available - Expose port
8080
In other words, Dockerfile isn’t just containerization config — it’s the file that assembles a runtime image capable of DB initialization after starting up on AWS.
docker/aws-entrypoint.sh
This is the process that runs immediately after the container starts. It’s quite important — it brings RDS on AWS into a state close to local before starting the app.
The flow inside is roughly as follows.
wait_for_database
dataset_version="$({ cat /app/initdb/01-dvdrental-full.sql; cat /app/initdb/02-convert-currency-to-jpy.sql; } | sha256sum | awk '{print $1}')"

if [ "$current_version" = "$dataset_version" ]; then
		log 'database already matches the development dataset version'
		return
fi

run_psql <<'SQL'
DROP SCHEMA IF EXISTS public CASCADE;
SQL

run_psql -f /app/initdb/01-dvdrental-full.sql
run_psql -f /app/initdb/02-convert-currency-to-jpy.sql
exec sh -c 'java $JAVA_OPTS -jar /app/app.jar'
Organizing what’s actually written, it has the following roles:
- Wait up to 60 times with
pg_isreadyuntil RDS is ready - Only proceed to dataset application when
APP_INIT_FULL_DATASET=true - Don’t allow anything other than
APP_DB_SCHEMA=public - Exit immediately if
POSTGRESQL_HOST,POSTGRESQL_USER,POSTGRESQL_PASSWORD, orPOSTGRESQL_DATABASEis missing - Build a dataset version from the SHA-256 of
01-dvdrental-full.sqland02-convert-currency-to-jpy.sql - Skip re-applying if the version saved in
public.app_dataset_metadatamatches - If the version differs, rebuild with
DROP SCHEMA IF EXISTS public CASCADEand reapply the SQL - Finally, start Spring Boot with
java $JAVA_OPTS -jar /app/app.jar
In other words, docker/aws-entrypoint.sh is the execution-control file that bundles together “wait for RDS,” “diff detection,” “apply the full dataset,” and “start the app.”
src/main/resources/application-aws-postgres.yml
This file runs Spring Boot with AWS-specific settings. It brings together how RDS connections, schema, cookies, and Flyway are handled.
The main settings actually in it look like this.
spring:
	config:
		activate:
			on-profile: aws-postgres
	datasource:
		url: jdbc:postgresql://${POSTGRESQL_HOST:localhost}:${POSTGRESQL_PORT:5432}/${POSTGRESQL_DATABASE:dvdrental}
		username: ${POSTGRESQL_USER:postgres}
		driver-class-name: org.postgresql.Driver
	flyway:
		enabled: ${SPRING_FLYWAY_ENABLED:true}

server:
	forward-headers-strategy: framework
	servlet:
		session:
			cookie:
				secure: ${SERVER_SERVLET_SESSION_COOKIE_SECURE:true}
What this file clearly settles is the following:
- The active profile is
aws-postgres - The RDS connection target comes from
POSTGRESQL_HOST,POSTGRESQL_PORT, andPOSTGRESQL_DATABASE - Use
org.postgresql.Driveras the JDBC driver - Run HikariCP with
maximum-pool-size: 10,minimum-idle: 5,connection-timeout: 20000 - Schema comes from
APP_DB_SCHEMA, defaulting topublic - Toggle Flyway on/off via an environment variable
- Use
forward-headers-strategy: frameworkso it works correctly behind an ALB - Allow the session cookie to be marked secure, assuming AWS
In other words, application-aws-postgres.yml is the file that fixes “which connection target and settings Spring Boot runs with after the container starts.”
infra/cdk/lib/dvd-rental-admin-stack.ts
This is the file that’s the actual target of cdk synth and cdk deploy. Almost everything about what gets created on the AWS side, and with what settings, is written here.
At the top of the file, it receives execution values from context.
const appName = this.node.tryGetContext('appName') ?? 'dvd-rental-admin';
const databaseName = this.node.tryGetContext('databaseName') ?? 'dvdrental';
const desiredCount = Number(this.node.tryGetContext('desiredCount') ?? 1);
const cpu = Number(this.node.tryGetContext('cpu') ?? 512);
const memoryMiB = Number(this.node.tryGetContext('memoryMiB') ?? 1024);
On top of that, it actually contains the following AWS resource definitions.
- Create a VPC
- Create three kinds of subnet:
public,application, anddatabase - Name the ECS cluster
${appName}-cluster - Create RDS PostgreSQL 17.4 on
t4g.micro - Use an Application Load Balanced Fargate Service
- Set the container port to
8080 - Set the health check path to
/login - Pass DB connection info from Secrets Manager to ECS
The environment variables passed to the ECS task are also directly in this file.
environment: {
	SERVER_PORT: '8080',
	SPRING_PROFILES_ACTIVE: 'aws-postgres',
	SPRING_FLYWAY_ENABLED: 'false',
	SERVER_SERVLET_SESSION_COOKIE_SECURE: sessionCookieSecure,
	APP_INIT_FULL_DATASET: 'true',
}
The values passed as secrets are also hard-set.
secrets: {
	POSTGRESQL_HOST: ecs.Secret.fromSecretsManager(connectionSecret, 'host'),
	POSTGRESQL_PORT: ecs.Secret.fromSecretsManager(connectionSecret, 'port'),
	POSTGRESQL_USER: ecs.Secret.fromSecretsManager(connectionSecret, 'username'),
	POSTGRESQL_PASSWORD: ecs.Secret.fromSecretsManager(connectionSecret, 'password'),
	POSTGRESQL_DATABASE: ecs.Secret.fromSecretsManager(connectionSecret, 'dbname'),
	APP_DB_SCHEMA: ecs.Secret.fromSecretsManager(connectionSecret, 'schema'),
}
In other words, dvd-rental-admin-stack.ts is the file that decides the execution conditions on the AWS side — including “how the VPC is divided,” “where ECS and RDS are placed,” “the env and secrets passed to the ECS task,” and “the ALB health check.”
When you actually run the commands, these four work together directly: Dockerfile builds the container, infra/cdk/lib/dvd-rental-admin-stack.ts places it on AWS, docker/aws-entrypoint.sh runs at startup, and finally Spring Boot connects to RDS using the settings in application-aws-postgres.yml.
At a high level, the flow has four stages:
- Build the app’s container with Docker
- Run CDK from the command line to create AWS resources
- Automatically run DB initialization via the entrypoint when the container starts
- Verify startup with CloudWatch Logs and the browser
In practice, it looks like this.
docker build -t dvd-rental-admin:latest .

cd infra/cdk
npm.cmd run synth
npm.cmd run deploy
With Windows + AWS SSO, I additionally loaded credentials into PowerShell first before running these.
$credentialEnv = aws configure export-credentials --profile AdministratorAccess-<AWS_ACCOUNT_ID> --format powershell | Out-String
Invoke-Expression $credentialEnv
$env:AWS_REGION='ap-northeast-1'
$env:AWS_DEFAULT_REGION='ap-northeast-1'
$env:AWS_ACCOUNT_ID='<AWS_ACCOUNT_ID>'
After that, I’d check the manifest’s region with cdk synth, and if there were no issues, move on to cdk deploy.
What matters is that I didn’t stop at just building the container and placing it on ECS. In docker/aws-entrypoint.sh, I wait until RDS becomes usable, apply 01-dvdrental-full.sql and 02-convert-currency-to-jpy.sql, and only then start the app. This lets me verify things on AWS with initial data close to what I use locally.
In short, what really mattered in this AWS setup was containerizing the app with Docker, codifying the infrastructure with CDK, and — including DB initialization at startup — assembling all the files needed for execution around the command line.
How I Placed It on AWS ECS/Fargate + RDS for PostgreSQL
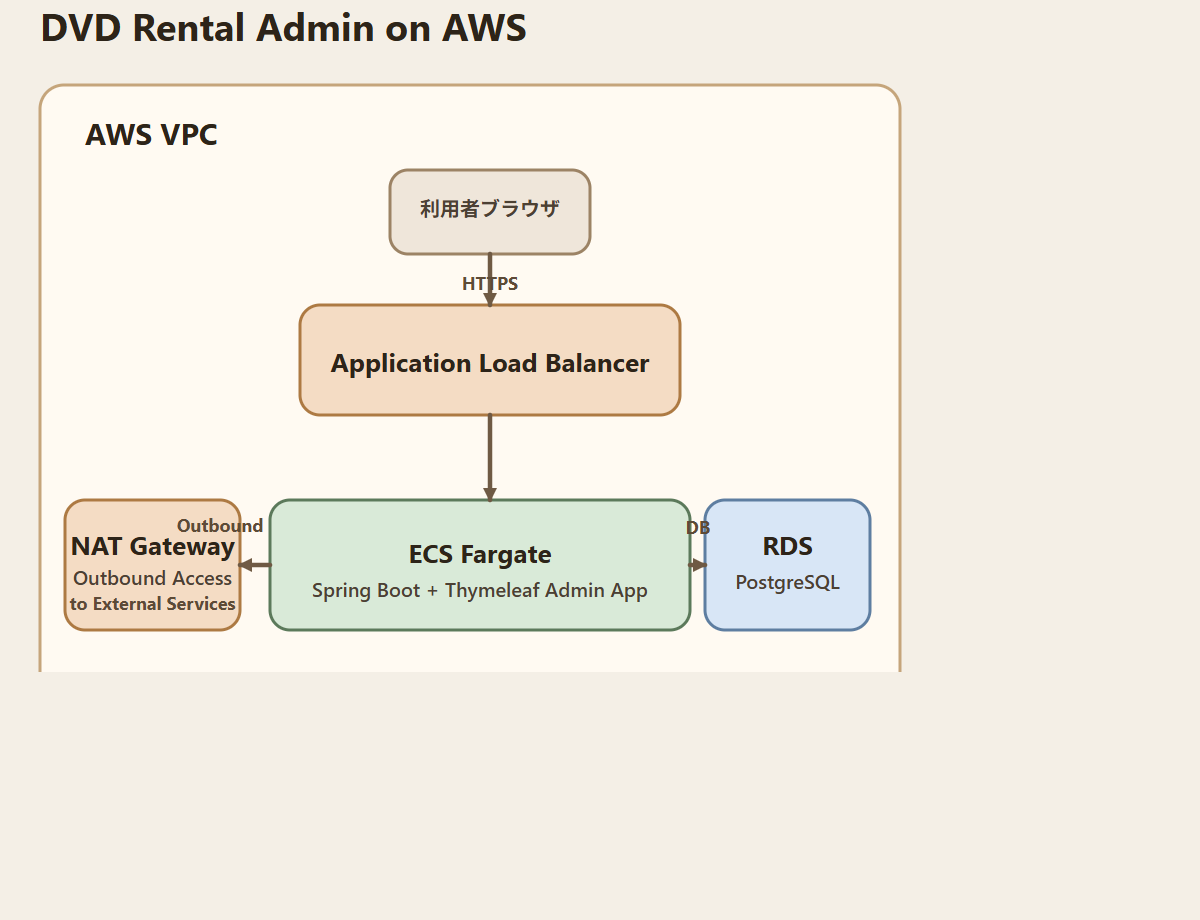
Broken down by role, the configuration I placed on AWS looks like this.
In other words, this lets you follow the basic configuration for placing a Spring Boot + PostgreSQL admin app on AWS ECS/Fargate and RDS for PostgreSQL directly.
- The entry point that receives access from users
- The application itself, which actually runs the admin screens
- The database that stores business data
- The network path the application uses to communicate externally
The configuration looks like this:
Internet ↓ Application Load Balancer ↓ Application on ECS Fargate ↓ RDS PostgreSQL
Outbound traffic from the application ↓ NAT Gateway ↓ Internet
This is a configuration where the ALB sits at the entrance, the ECS Fargate application sits behind it, and PostgreSQL sits further inside.
I chose this configuration for three reasons:
- To avoid exposing the application itself directly to the internet
- To protect the database by placing it even further inside
- To run the app in a container and make redeployment easier
Unlike a public-facing service, an admin app tends to handle more sensitive information and stronger operating privileges, so I prioritized a configuration that separates the entry point, the application, and the database in stages.
How I Approached Database Initialization for RDS for PostgreSQL
For this app, instead of just leaving the database on AWS empty, I made it possible to load data close to what’s in the local development environment.
Specifically, the entrypoint script, before the application container starts, performs the following:
- Wait until PostgreSQL becomes usable
- Apply the full dataset SQL for the development environment
- Apply the SQL for JPY conversion
- Then start the Spring Boot application
With this approach, I can verify login and list screens on AWS under conditions close to local.
What I Actually Got Stuck On During the AWS ECS/Fargate + RDS Deployment
In the process of getting this onto AWS, there were a few clear pitfalls.
1. Spring Profile Mismatch
ECS was starting with aws-postgres, but the config file side was split into aws and postgres, which caused it to fall through to unintended settings.
To fix this, I consolidated the AWS settings into application-aws-postgres.yml so the profile name and the config content line up.
2. Startup Completion Is Hard to Judge
Even after CloudFormation reported completion, the new task sometimes hadn’t fully started yet, or the browser was still showing an old state.
Because of this, I check completion in the following order:
- CloudFormation completion
- ECS Service reaching steady state
- Confirming the profile, JDBC URL, dataset initialization completion, and app startup logs in CloudWatch Logs
- Finally, confirming a successful login in the browser
3. Insufficient Mobile Display Verification
If you check only the login screen and call it done, the post-login screens that share a common layout can end up broken.
So when fixing mobile display, I made sure to include not just the login screen but also the dashboard and each admin screen in the verification scope.
What I Prioritized from a Configuration and Operations Standpoint
What I prioritized most in this build was not just getting it running on AWS, but building a configuration that can be handled continuously afterward.
Specifically, I prioritized the following points.
1. Not Exposing the Application Directly
Rather than allowing direct access to the ECS task, I placed an ALB at the entrance to clearly separate what’s exposed.
2. Placing the Database Even Further Inside
I made it so RDS can only be connected to from the application, and configured it so it can’t be reached directly from the internet.
3. Building Post-Deployment Verification into Operations
I made completion judgment include not just CloudFormation finishing, but also ECS, CloudWatch Logs, and browser verification.
4. Not Repeating the Same Mistakes When Problems Occur
I documented the problems that came up, improvements, and operating rules so they can be reused the next time I rebuild this.
What I Noticed Looking at Billing
After getting as far as verifying that everything worked, I found that AWS billing was a secondary point in the configuration decisions that couldn’t be ignored.
The elements that actually tend to drive up cost were:
- NAT Gateway
- Application Load Balancer
- ECS Fargate
- RDS
NAT Gateway and ALB in particular tend to accumulate close to a fixed cost even with light usage, making this heavier than expected as a verification environment.
What I learned here is that stopping ECS or RDS alone isn’t enough. Billing continues as long as the ALB or NAT Gateway remain.
Because of that, my operating decision changed to going all the way to “deleting the stack” rather than just “stopping” during periods when it’s not in use.
What I’m Glad I Did This Time
What went well in this work was not stopping at implementation, but organizing it into a form I can reuse later.
Specifically, I put together the following three types of materials.
- A general-audience overview of the configuration
- A detailed record of the actual build and incident response
- An operations memo for continuously updating issues, problems, improvements, and results
If I stopped at just building it, I’d likely get stuck on the same points again next time, but recording the configuration, problems, improvements, and results makes rebuilding and writing about it much easier.
Summary
Getting a Spring Boot + Thymeleaf admin app running on AWS ECS/Fargate turned out to require more than just deployment work — I needed to work through configuration design, operating procedures, security, and verification methods as well.
What I learned in particular this time:
- An admin app isn’t just about working — you need to decide up front how far to expose it
- For a server-rendered admin screen, state-retention design matters
- CloudFormation completion alone isn’t enough to judge that an AWS deployment is done
- Placing the database and the application in staged separation is easier to manage
- Even in a verification environment, ALB and NAT Gateway tend to drive up cost
- There are cases where deleting is more appropriate than stopping
- Keeping work records and configuration documentation makes things much easier from next time on
I hope this is useful to others in the same position — anyone looking to put a Spring Boot business app on AWS, or weighing the balance between configuration and cost.